概述
安装ceph-nautilus(14.2.22)测试环境,用于调试/学习ceph-csi
安装ceph-nautilus
环境
centos-41 192.168.4.41 CentOS Linux release 7.8.2003 (Core)
centos-42 192.168.4.42 CentOS Linux release 7.8.2003 (Core)
centos-43 192.168.4.43 CentOS Linux release 7.8.2003 (Core)
准备
(全部执行) 配置文件夹
1
2
|
mkdir -p /usr/local/ceph/{admin,etc,lib,logs} && \
chown -R 167:167 /usr/local/ceph/
|
(全部执行) host
1
2
3
4
5
|
cat >> /etc/hosts <<EOF
192.168.4.41 centos-41
192.168.4.42 centos-42
192.168.4.43 centos-43
EOF
|
(全部执行) ceph 命令
1
2
|
echo 'alias ceph="docker exec mon ceph"' >> /etc/profile && \
source /etc/profile
|
(全部执行) ntp
1
|
yum install -y ntp && systemctl start ntpd && systemctl enable ntpd
|
docker
安装docker,略
1
2
|
sed -i 's/enforcing/disabled/' /etc/selinux/config && \
setenforce 0
|
提前拉取镜像,略
1
|
docker pull ceph/daemon:latest-nautilus
|
磁盘
3.1 (全部执行) 使用虚拟磁盘文件
 1
 2
 3
 4
 5
 6
 7
 8
 9
10
11
12
13
14
15
16
17
|
mkdir -p /usr/local/ceph-disk

# 初始化10G的镜像文件
dd if=/dev/zero of=/usr/local/ceph-disk/ceph-disk-01 bs=1G count=10

# 将镜像文件虚拟成块设备
losetup -f /usr/local/ceph-disk/ceph-disk-01

# 格式化
mkfs.xfs -f /dev/loop0

# 创建文件夹
mkdir -p /dev/osd

# 编辑fstab
vim /etc/fstab
# 添加一行
|
3.2 (全部执行) 独立磁盘
1
2
3
4
5
6
7
8
9
|
# 格式化
mkfs.xfs -f /dev/sdb && mkdir -p /dev/osd

#编辑fstab
vim /etc/fstab
# 添加一行
echo "/dev/sdb  /dev/osd xfs defaults 0 0" >> /etc/fstab && cat /etc/fstab
# 挂在
mount -a
|
部署
(在 centos-41 执行) 生成文件
 1
 2
 3
 4
 5
 6
 7
 8
 9
10
11
12
13
14
15
|
cat >/usr/local/ceph/admin/start_mon.sh <<EOF
docker run -d --net=host \\
    --name=mon \\
    --restart=always \\
    -v /etc/localtime:/etc/localtime \\
    -v /usr/local/ceph/etc:/etc/ceph \\
    -v /usr/local/ceph/lib:/var/lib/ceph \\
    -v /usr/local/ceph/logs:/var/log/ceph \\
    -e MON_IP=192.168.4.41,192.168.4.42,192.168.4.43 \\
    -e CEPH_PUBLIC_NETWORK=192.168.4.0/24 \\
    -e NETWORK_AUTO_DETECT=4 \\
    ceph/daemon:latest-nautilus mon
EOF

sh /usr/local/ceph/admin/start_mon.sh
|
 1
 2
 3
 4
 5
 6
 7
 8
 9
10
11
12
13
14
15
16
17
|
cat >/usr/local/ceph/admin/start_osd.sh <<EOF
docker run -d \\
    --name=osd \\
    --net=host \\
    --restart=always \\
    --privileged=true \\
    --pid=host \\
    -v /etc/localtime:/etc/localtime \\
    -v /usr/local/ceph/etc:/etc/ceph \\
    -v /usr/local/ceph/lib:/var/lib/ceph \\
    -v /usr/local/ceph/logs:/var/log/ceph \\
    -v /dev/osd:/var/lib/ceph/osd \\
    -e NETWORK_AUTO_DETECT=4 \\
    ceph/daemon:latest-nautilus osd_directory
EOF

sh /usr/local/ceph/admin/start_osd.sh
|
 1
 2
 3
 4
 5
 6
 7
 8
 9
10
11
12
13
|
cat >/usr/local/ceph/admin/start_mgr.sh <<EOF
docker run -d --net=host  \\
  --name=mgr \\
  --restart=always \\
  -v /etc/localtime:/etc/localtime \\
  -v /usr/local/ceph/etc:/etc/ceph \\
  -v /usr/local/ceph/lib:/var/lib/ceph \\
  -v /usr/local/ceph/logs:/var/log/ceph \\
  -e NETWORK_AUTO_DETECT=4 \\
  ceph/daemon:latest-nautilus mgr
EOF

sh /usr/local/ceph/admin/start_mgr.sh
|
 1
 2
 3
 4
 5
 6
 7
 8
 9
10
11
12
13
14
|
cat >/usr/local/ceph/admin/start_rgw.sh <<EOF
docker run \\
    -d --net=host \\
    --name=rgw \\
    --restart=always \\
    -v /etc/localtime:/etc/localtime \\
    -v /usr/local/ceph/etc:/etc/ceph \\
    -v /usr/local/ceph/lib:/var/lib/ceph \\
    -v /usr/local/ceph/logs:/var/log/ceph \\
    -e NETWORK_AUTO_DETECT=4 \\
    ceph/daemon:latest-nautilus rgw
EOF

sh /usr/local/ceph/admin/start_rgw.sh
|
mon
(在 centos-41 执行)
先启动centos-41的mon
1
|
sh /usr/local/ceph/admin/start_mon.sh
|
编辑配置文件
1
|
vim /usr/local/ceph/etc/ceph.conf
|
添加以下内容
 1
 2
 3
 4
 5
 6
 7
 8
 9
10
11
12
|
#
mon clock drift allowed = 2
mon clock drift warn backoff = 30
#
mon_allow_pool_delete = true

[mgr]
#
mgr modules = dashboard
[client.rgw.centos-41]
#
rgw_frontends = "civetweb port=20003"
|
注意 [client.rgw.centos-41],修改完后重启一下 docker restart mon
复制到其他节点
1
2
|
scp -r /usr/local/ceph centos-42:/usr/local/
scp -r /usr/local/ceph centos-43:/usr/local/
|
其他节点启动
1
2
|
ssh centos-42 bash /usr/local/ceph/admin/start_mon.sh
ssh centos-43 bash /usr/local/ceph/admin/start_mon.sh
|
osd
(全部执行) 启动osd之前,先执行
1
|
docker exec -it mon ceph auth get client.bootstrap-osd -o /var/lib/ceph/bootstrap-osd/ceph.keyring
|
(全部执行) 启动osd
1
|
sh /usr/local/ceph/admin/start_osd.sh
|
3台机器启动后:
 1
 2
 3
 4
 5
 6
 7
 8
 9
10
11
12
13
14
15
16
17
18
|
ceph -s
[centos-41] ~ ceph -s
  cluster:
    id:     3e8299d4-6f8f-485d-a508-7ad161d36f36
    health: HEALTH_WARN
            no active mgr
            mons are allowing insecure global_id reclaim

  services:
    mon: 3 daemons, quorum centos-41,centos-42,centos-43 (age 95s)
    mgr: no daemons active
    osd: 3 osds: 3 up (since 5s), 3 in (since 5s)

  data:
    pools:   0 pools, 0 pgs
    objects: 0 objects, 0 B
    usage:   0 B used, 0 B / 0 B avail
    pgs:
|
问题
使用独立磁盘的方式,分配的磁盘是 20G,
 1
 2
 3
 4
 5
 6
 7
 8
 9
10
11
12
13
14
15
16
|
[centos-41] ~ fdisk -l

Disk /dev/sda: 42.9 GB, 42949672960 bytes, 83886080 sectors
Units = sectors of 1 * 512 = 512 bytes
Sector size (logical/physical): 512 bytes / 512 bytes
I/O size (minimum/optimal): 512 bytes / 512 bytes
Disk label type: dos
Disk identifier: 0x0009ef1a

   Device Boot      Start         End      Blocks   Id  System
/dev/sda1   *        2048    83886079    41942016   83  Linux

Disk /dev/sdb: 21.5 GB, 21474836480 bytes, 41943040 sectors
Units = sectors of 1 * 512 = 512 bytes
Sector size (logical/physical): 512 bytes / 512 bytes
I/O size (minimum/optimal): 512 bytes / 512 bytes
|
但是创建出来的block为100G
 1
 2
 3
 4
 5
 6
 7
 8
 9
10
11
12
13
14
15
|
[centos-41] ~ cd /dev/osd/ceph-0
[centos-41] ceph-0 ls -lh
total 37M
-rw-r--r--. 1 167 167 100G Feb  7 15:55 block
-rw-------. 1 167 167    2 Feb  7 13:20 bluefs
-rw-------. 1 167 167   37 Feb  7 13:20 ceph_fsid
-rw-r--r--. 1 167 167   37 Feb  7 13:20 fsid
-rw-------. 1 167 167   56 Feb  7 13:20 keyring
-rw-------. 1 167 167    8 Feb  7 13:20 kv_backend
-rw-------. 1 167 167   21 Feb  7 13:20 magic
-rw-------. 1 167 167    4 Feb  7 13:20 mkfs_done
-rw-------. 1 167 167    6 Feb  7 13:20 ready
-rw-------. 1 167 167    3 Feb  7 13:20 require_osd_release
-rw-------. 1 167 167   10 Feb  7 13:20 type
-rw-------. 1 167 167    2 Feb  7 13:20 whoami
|
在ceph上显示出来也是100G
 1
 2
 3
 4
 5
 6
 7
 8
 9
10
11
12
13
14
15
16
17
18
|
[centos-41] ceph-0 ceph -s
  cluster:
    id:     3e8299d4-6f8f-485d-a508-7ad161d36f36
    health: HEALTH_OK

  services:
    mon: 3 daemons, quorum centos-41,centos-42,centos-43 (age 76m)
    mgr: centos-41(active, since 76m), standbys: centos-42, centos-43
    osd: 3 osds: 3 up (since 76m), 3 in (since 2h)
    rgw: 3 daemons active (centos-41, centos-42, centos-43)

  task status:

  data:
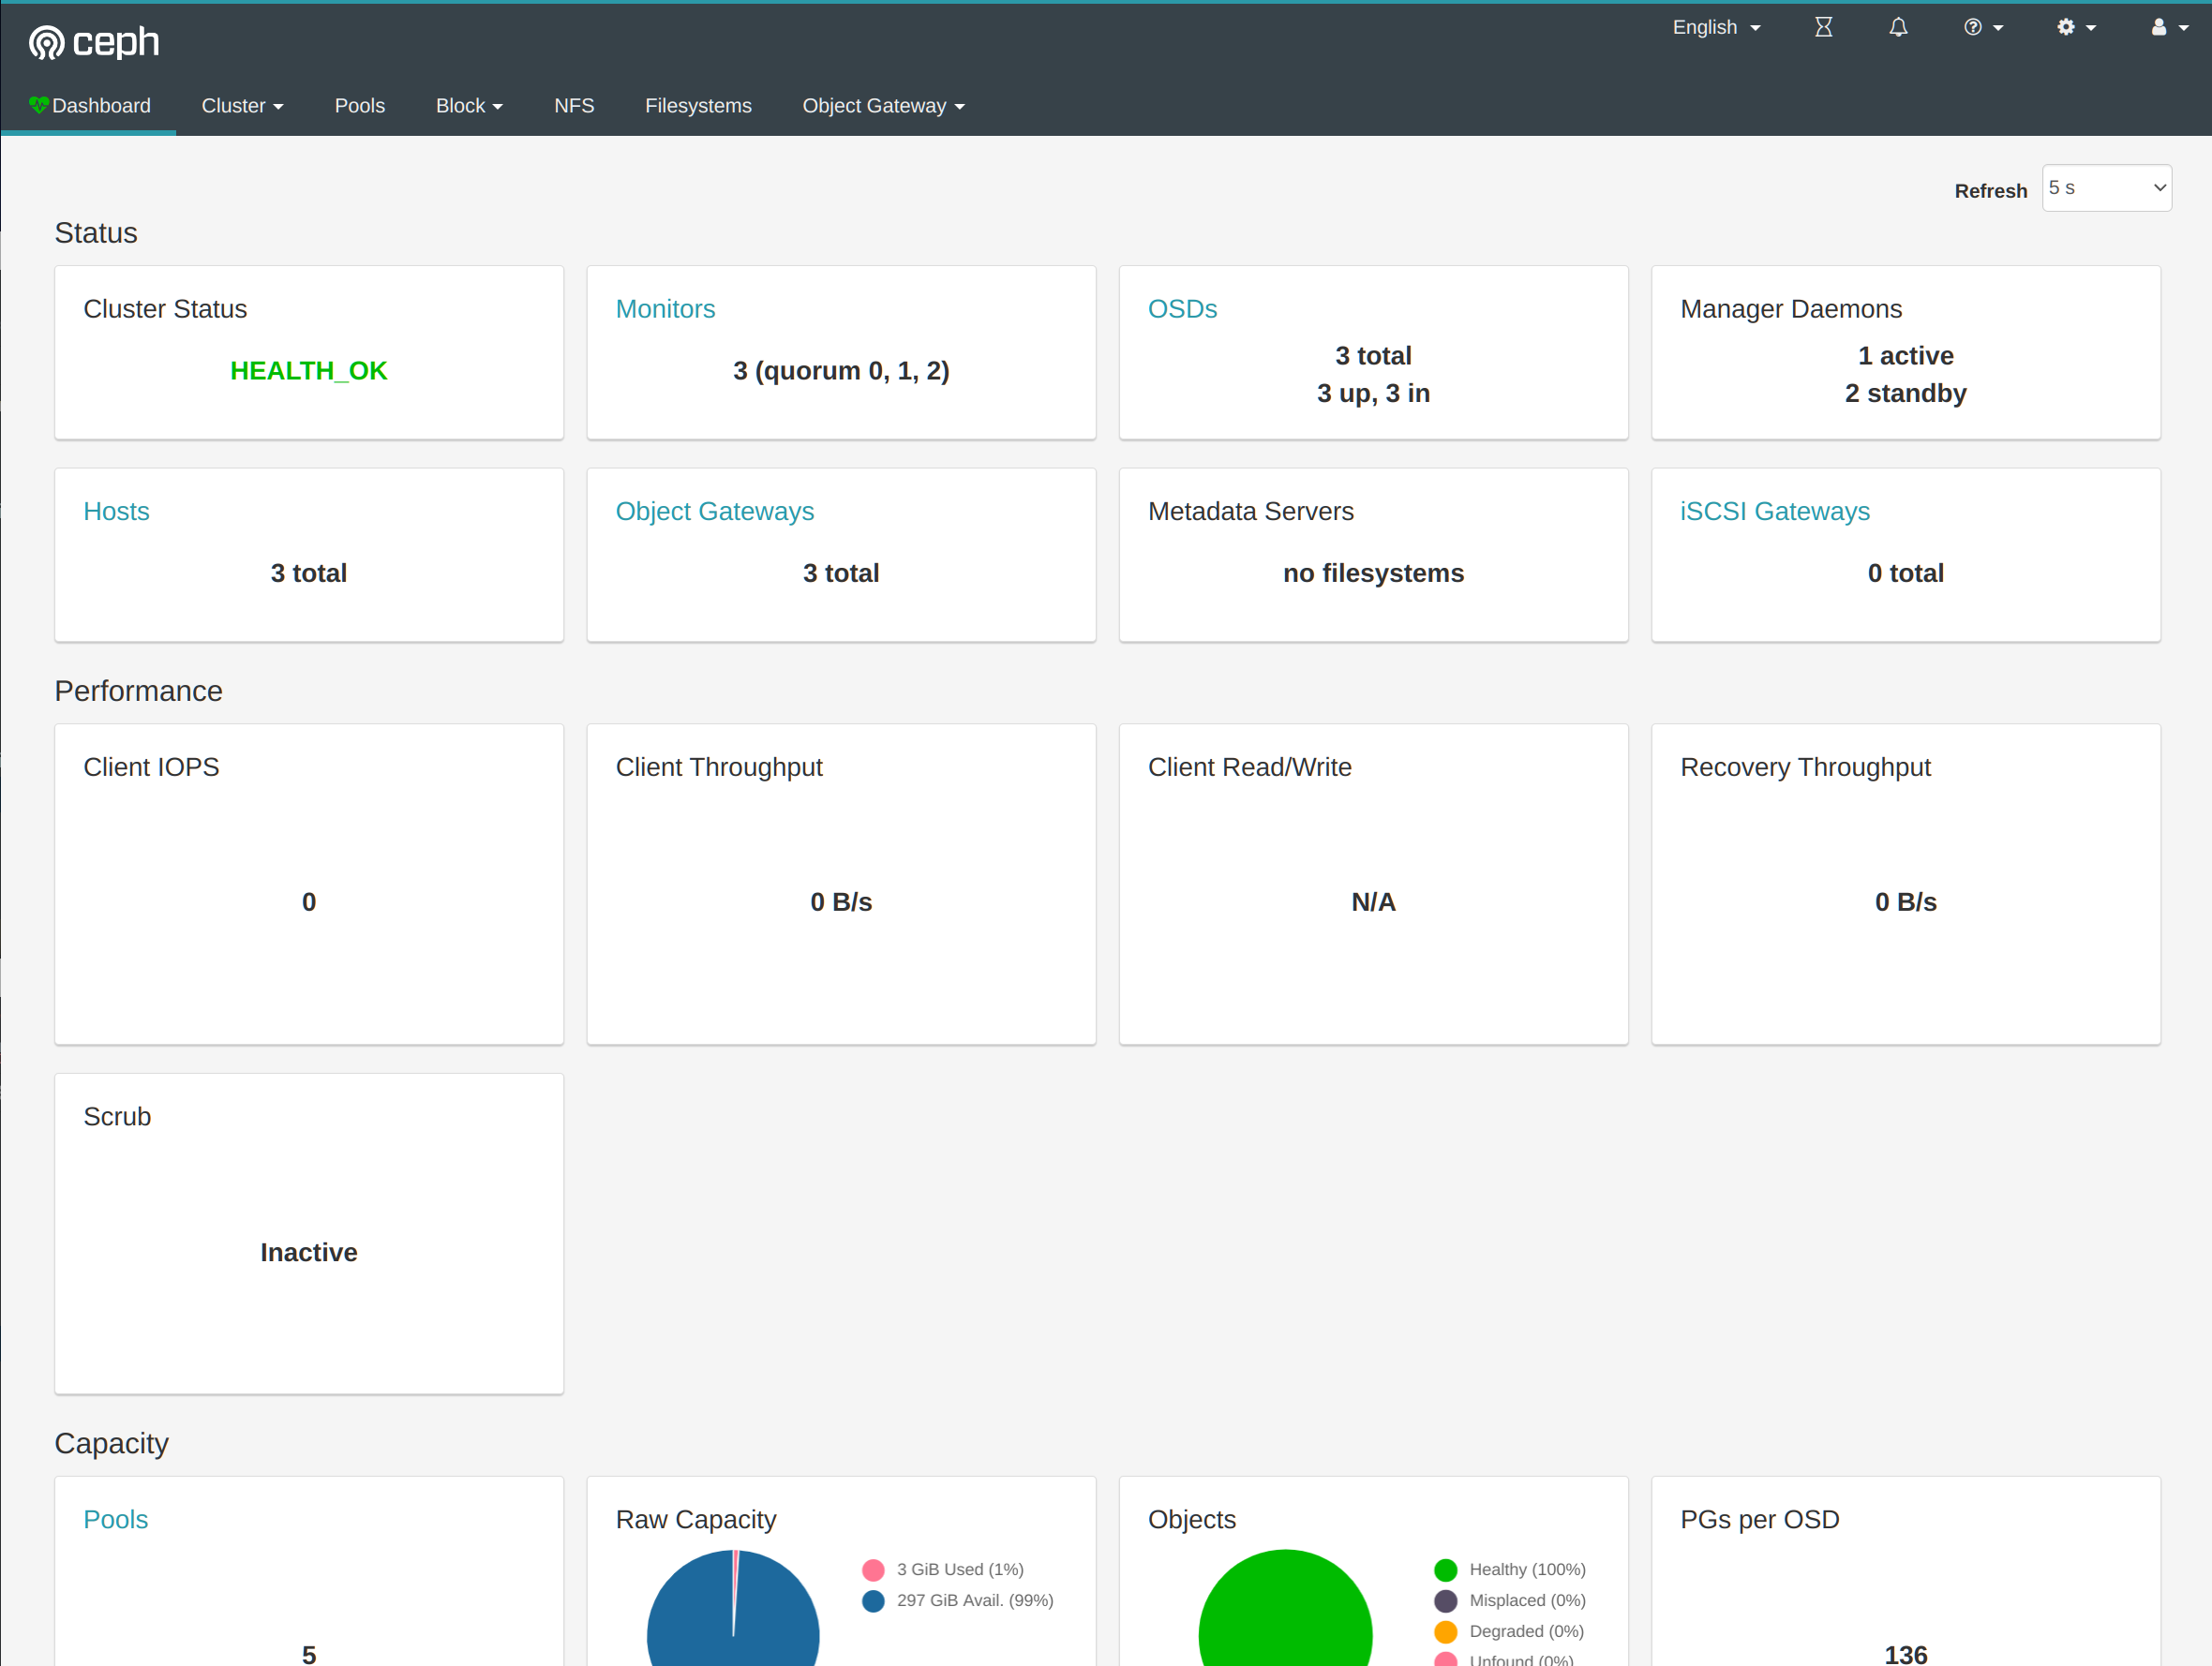
    pools:   5 pools, 136 pgs
    objects: 202 objects, 3.2 MiB
    usage:   3.0 GiB used, 297 GiB / 300 GiB avail
    pgs:     136 active+clean
|
待研究…
mgr
(全部执行) 启动
1
|
sh /usr/local/ceph/admin/start_mgr.sh
|
rgw
(全部执行) 启动rgw之前,先执行
1
|
docker exec mon ceph auth get client.bootstrap-rgw -o /var/lib/ceph/bootstrap-rgw/ceph.keyring
|
(全部执行) 启动
1
|
sh /usr/local/ceph/admin/start_rgw.sh
|
5 dashboard
(在 centos-41 执行)
 1
 2
 3
 4
 5
 6
 7
 8
 9
10
11
12
13
14
15
16
17
18
19
20
21
22
23
24
25
26
|
# centos-41节点
docker exec mgr ceph mgr module enable dashboard

# 进入mgr容器
docker exec -it mgr sh
# mgr容器中执行
echo "test" > test
ceph dashboard set-login-credentials admin -i test
exit

# centos-41节点
docker exec mgr ceph config set mgr mgr/dashboard/server_port 18080
docker exec mgr ceph config set mgr mgr/dashboard/server_addr 192.168.4.41
# 关闭https
docker exec mgr ceph config set mgr mgr/dashboard/ssl false
# 重启
docker restart mgr
# 查看
docker exec mgr ceph mgr services
{
    "dashboard": "http://centos-41:18080/"
}

# ceph版本
[centos-41] ~ ceph version
ceph version 14.2.22 (ca74598065096e6fcbd8433c8779a2be0c889351) nautilus (stable)
|
访问ui页面:http://192.168.4.41:18080/

安装ceph-csi
ceph新建pool
(在 centos-41 执行) 新建pool
 1
 2
 3
 4
 5
 6
 7
 8
 9
10
11
|
# centos-41节点
# 后面的8有待斟酌
[centos-41] ~ ceph osd pool create kubernetes 8

# 查看pool
[centos-41] ~ ceph osd lspools
1 .rgw.root
2 default.rgw.control
3 default.rgw.meta
4 default.rgw.log
5 kubernetes
|
(在 centos-41 执行) 新建ceph用户
1
2
3
4
|
[centos-41] ~ ceph auth get-or-create client.kubernetes mon 'profile rbd' osd 'profile rbd pool=kubernetes' mgr 'profile rbd pool=kubernetes'

[client.kubernetes]
    key = AQBnz11fclrxChAAf8TFw8ROzmr8ifftAHQbTw==
|
(在 centos-41 执行) 重新查看用户
1
2
3
4
5
6
7
8
|
[centos-41] ~ ceph auth get client.kubernetes

[client.kubernetes]
        key = AQBnz11fclrxChAAf8TFw8ROzmr8ifftAHQbTw==
        caps mgr = "profile rbd pool=kubernetes"
        caps mon = "profile rbd"
        caps osd = "profile rbd pool=kubernetes"
exported keyring for client.kubernetes
|
(在 centos-41 执行) 获取集群信息
 1
 2
 3
 4
 5
 6
 7
 8
 9
10
|
[centos-41] ~ ceph mon dump
epoch 3
fsid 3e8299d4-6f8f-485d-a508-7ad161d36f36
last_changed 2023-02-07 13:19:05.465199
created 2023-02-07 13:17:00.447880
min_mon_release 14 (nautilus)
0: [v2:192.168.4.41:3300/0,v1:192.168.4.41:6789/0] mon.centos-41
1: [v2:192.168.4.42:3300/0,v1:192.168.4.42:6789/0] mon.centos-42
2: [v2:192.168.4.43:3300/0,v1:192.168.4.43:6789/0] mon.centos-43
dumped monmap epoch 3
|
helm安装ceph-csi
1
2
|
# 这里使用的版本是 commit 650c522ce016bcff86d590006d120f7b829fb93d
git clone git@github.com:ceph/ceph-csi.git
|
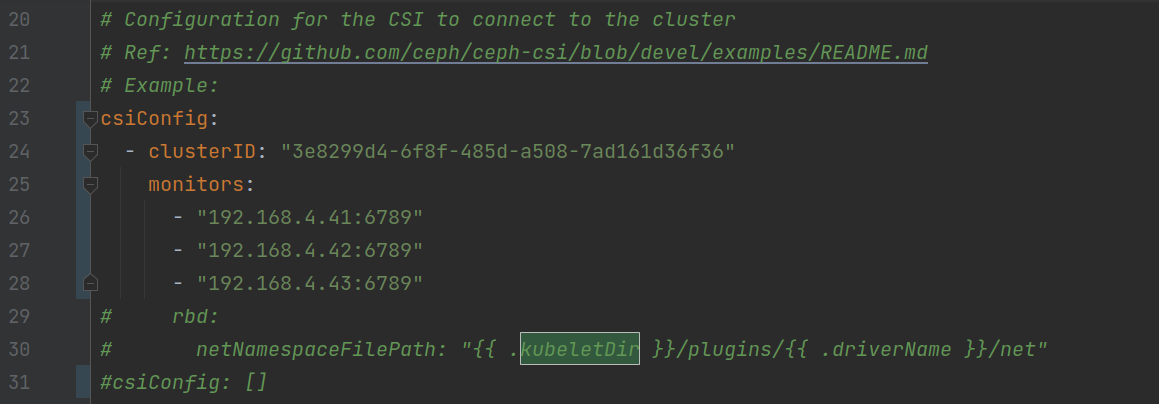
修改配置文件 ceph-csi/charts/ceph-csi-rbd/values.yaml
csiConfig
 1
 2
 3
 4
 5
 6
 7
 8
 9
10
11
12
13
14
|
# csiConfig:
#   - clusterID: "<cluster-id>"
#     monitors:
#       - "<MONValue1>"
#       - "<MONValue2>"

改为

csiConfig:
  - clusterID: "3e8299d4-6f8f-485d-a508-7ad161d36f36"
    monitors:
      - "192.168.4.41:6789"
      - "192.168.4.42:6789"
      - "192.168.4.43:6789"
|

provisioner
1
2
3
|
provisioner:
  name: provisioner
  replicaCount: 1 # 测试环境改为1即可,也可以不改
|
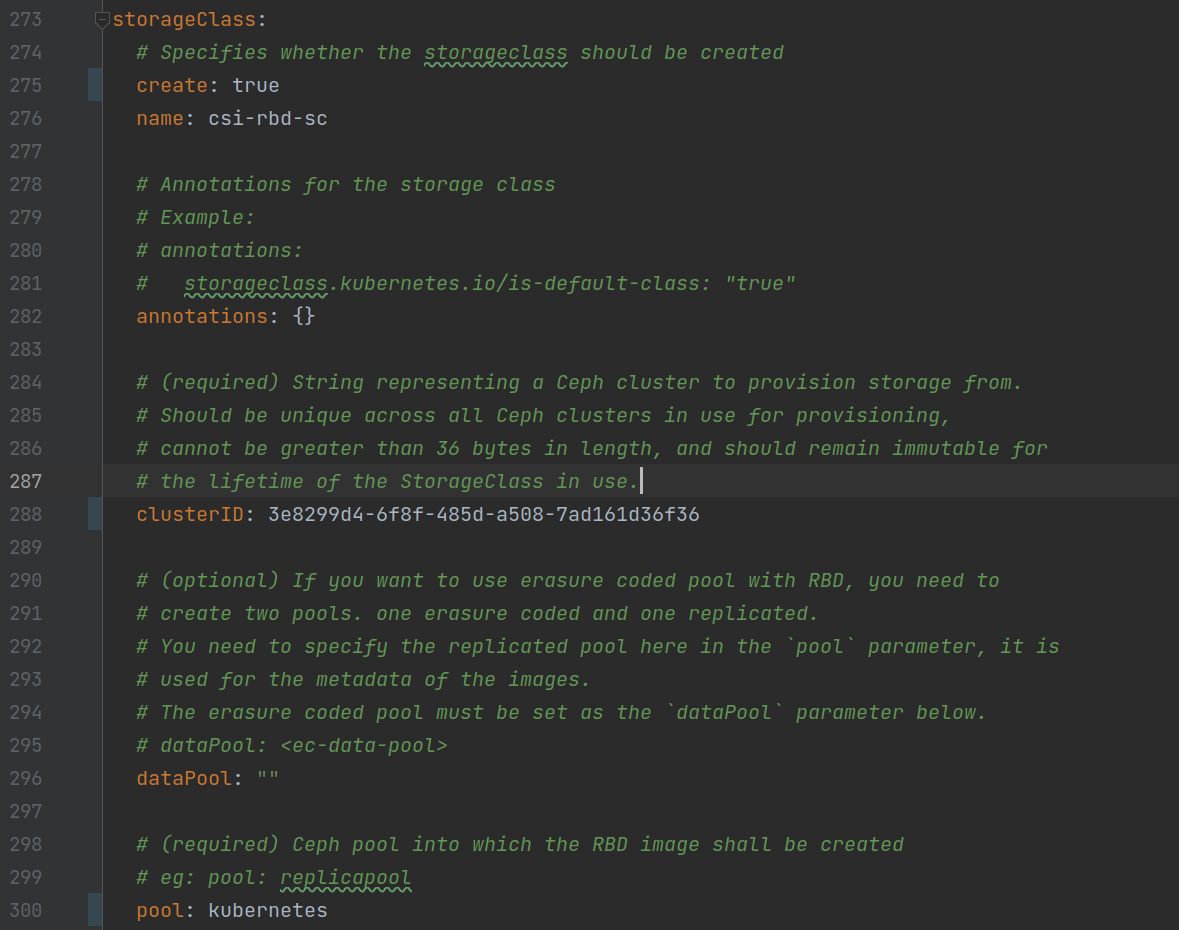
storageClass
1
2
3
|
create: true
clusterID: 3e8299d4-6f8f-485d-a508-7ad161d36f36
pool: kubernetes
|

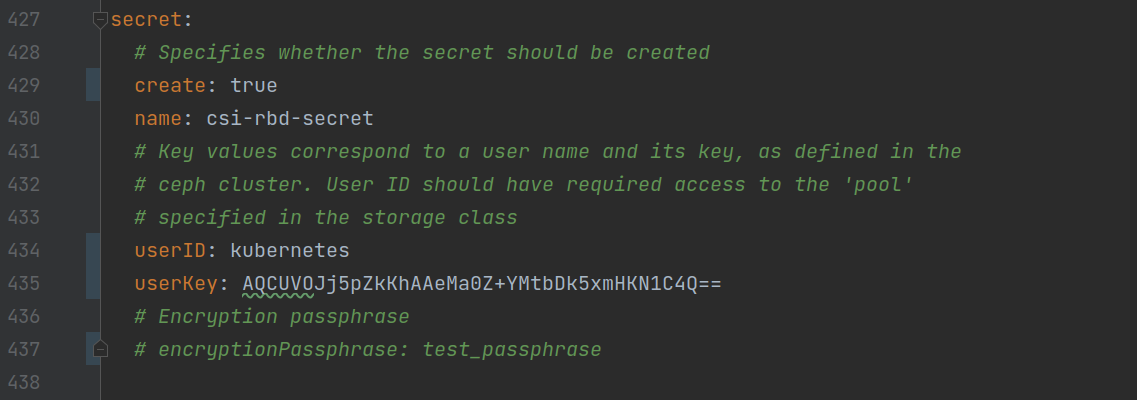
secret
 1
 2
 3
 4
 5
 6
 7
 8
 9
10
11
|
secret:
  # Specifies whether the secret should be created
  create: true
  name: csi-rbd-secret
  # Key values correspond to a user name and its key, as defined in the
  # ceph cluster. User ID should have required access to the 'pool'
  # specified in the storage class
  userID: kubernetes
  userKey: AQCUVOJj5pZkKhAAeMa0Z+YMtbDk5xmHKN1C4Q==
  # Encryption passphrase
  # encryptionPassphrase: test_passphrase
|

修改完成后,使用helm部署
1
2
3
|
cd ceph-csi/charts/ceph-csi-rbd
# 使用helm部署有很多种方式,随便选一种
helm install ceph-csi -n ceph-csi --create-namespace .
|
查看部署情况
1
2
3
4
5
|
k get pod -n ceph-csi

NAME                                                 READY   STATUS    RESTARTS   AGE
ceph-csi-ceph-csi-rbd-nodeplugin-jk7xv               3/3     Running   0          56m
ceph-csi-ceph-csi-rbd-provisioner-7c4b4b99f8-q6tcc   7/7     Running   0          56m
|
测试,使用ceph-csi项目里面的examples文件即可
 1
 2
 3
 4
 5
 6
 7
 8
 9
10
11
12
13
14
15
16
17
18
19
20
21
22
23
24
25
26
27
28
29
30
31
32
33
34
35
36
37
38
39
40
41
42
43
44
45
46
47
48
49
50
51
52
53
54
55
56
57
58
59
60
61
62
63
64
65
|
cd ceph-csi/examples/rbd

# 查看pvc
cat pvc.yaml

---
apiVersion: v1
kind: PersistentVolumeClaim
metadata:
  name: rbd-pvc
spec:
  accessModes:
    - ReadWriteOnce
  resources:
    requests:
      storage: 1Gi
  storageClassName: csi-rbd-sc


# 创建pvc
k apply -f pvc.yaml

persistentvolumeclaim/rbd-pvc created


# 查看pv
k get pv

NAME                                       CAPACITY   ACCESS MODES   RECLAIM POLICY   STATUS   CLAIM             STORAGECLASS   REASON   AGE
pvc-18ed32d9-3d09-4af4-b08e-eb2a3199784c   1Gi        RWO            Delete           Bound    default/rbd-pvc   csi-rbd-sc              107s


# 查看pod
cat pod.yaml

---
apiVersion: v1
kind: Pod
metadata:
  name: csi-rbd-demo-pod
spec:
  containers:
    - name: web-server
      image: docker.io/library/nginx:latest
      volumeMounts:
        - name: mypvc
          mountPath: /var/lib/www/html
  volumes:
    - name: mypvc
      persistentVolumeClaim:
        claimName: rbd-pvc
        readOnly: false


# 创建pod使用pvc
k apply -f pod.yaml

pod/csi-rbd-demo-pod created


# pod创建成功
k get pod csi-rbd-demo-pod

NAME               READY   STATUS    RESTARTS   AGE
csi-rbd-demo-pod   1/1     Running   0          23s
|
查看自动创建的pv详情:
 1
 2
 3
 4
 5
 6
 7
 8
 9
10
11
12
13
14
15
16
17
18
19
20
21
22
23
24
25
26
27
28
29
30
31
32
33
34
35
36
37
38
39
40
41
42
43
44
45
46
47
48
49
50
|
k get pv pvc-18ed32d9-3d09-4af4-b08e-eb2a3199784c -o yaml

apiVersion: v1
kind: PersistentVolume
metadata:
  annotations:
    pv.kubernetes.io/provisioned-by: rbd.csi.ceph.com
    volume.kubernetes.io/provisioner-deletion-secret-name: csi-rbd-secret
    volume.kubernetes.io/provisioner-deletion-secret-namespace: ceph-csi
  creationTimestamp: "2023-02-07T15:33:27Z"
  finalizers:
  - external-provisioner.volume.kubernetes.io/finalizer
  - kubernetes.io/pv-protection
  name: pvc-18ed32d9-3d09-4af4-b08e-eb2a3199784c
  resourceVersion: "4518417"
  uid: e08773e0-db20-4d6d-92b7-820cdf07471f
spec:
  accessModes:
  - ReadWriteOnce
  capacity:
    storage: 1Gi
  claimRef:
    apiVersion: v1
    kind: PersistentVolumeClaim
    name: rbd-pvc
    namespace: default
    resourceVersion: "4518412"
    uid: 18ed32d9-3d09-4af4-b08e-eb2a3199784c
  csi:
    controllerExpandSecretRef:
      name: csi-rbd-secret
      namespace: ceph-csi
    driver: rbd.csi.ceph.com
    fsType: ext4
    nodeStageSecretRef:
      name: csi-rbd-secret
      namespace: ceph-csi
    volumeAttributes:
      clusterID: 3e8299d4-6f8f-485d-a508-7ad161d36f36
      imageFeatures: layering
      imageName: csi-vol-ae2b485c-d4e5-499c-9bec-443b5b62350c
      journalPool: kubernetes
      pool: kubernetes
      storage.kubernetes.io/csiProvisionerIdentity: 1675780458211-8081-rbd.csi.ceph.com
    volumeHandle: 0001-0024-3e8299d4-6f8f-485d-a508-7ad161d36f36-0000000000000005-ae2b485c-d4e5-499c-9bec-443b5b62350c
  persistentVolumeReclaimPolicy: Delete
  storageClassName: csi-rbd-sc
  volumeMode: Filesystem
status:
  phase: Bound
|
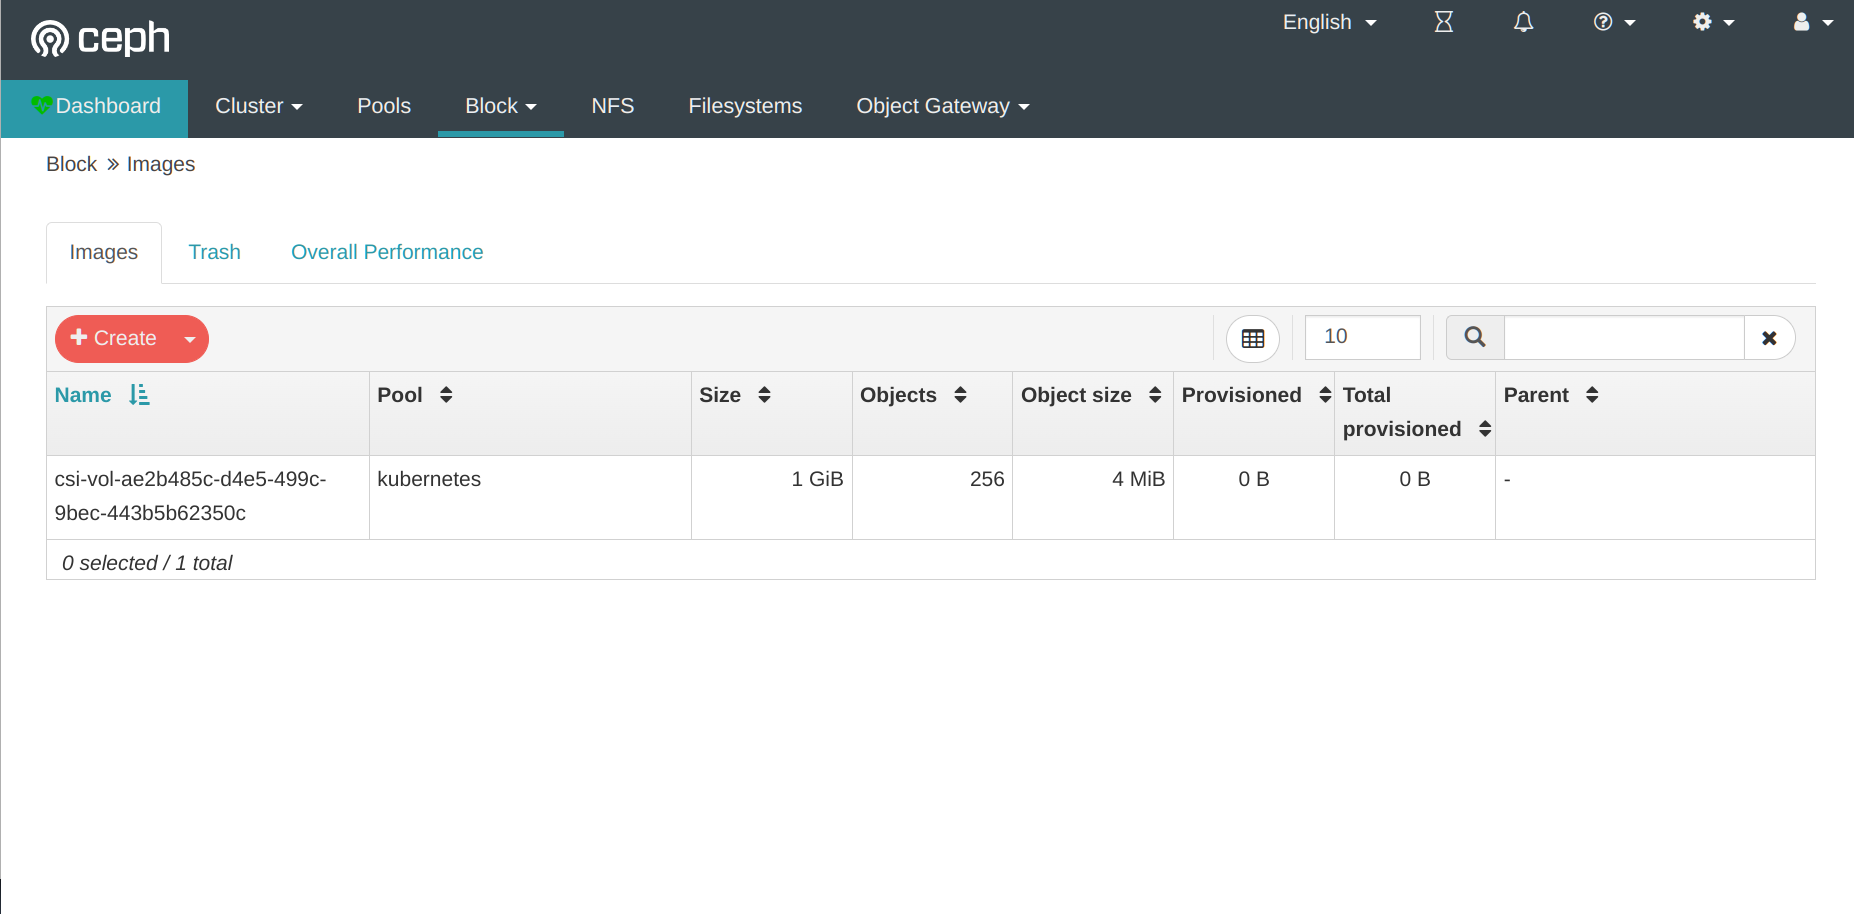
imageName: csi-vol-ae2b485c-d4e5-499c-9bec-443b5b62350c 与 ui 查看的相符合

注意
在k8s中使用 ceph 存储,需要在各个节点上安装 ceph-common
问题
1
|
ceph config set mon auth_allow_insecure_global_id_reclaim false
|
需要修改 mon 容器里面的启动脚本
1
2
3
4
5
6
|
docker cp mon:/opt/ceph-container/bin/start_mon.sh .
# 注释此行,直接将v2v1复制为2,代表是走V2协议, 以指定IP方式加入集群
#v2v1=$(ceph-conf -c /etc/ceph/${CLUSTER}.conf 'mon host' | tr ',' '\n' | grep -c ${MON_IP})
v2v1=2

docker cp start_mon.sh mon:/opt/ceph-container/bin/start_mon.sh
|
1
2
3
4
5
|
[centos-41] ~ ceph health detail
HEALTH_WARN application not enabled on 1 pool(s)
POOL_APP_NOT_ENABLED application not enabled on 1 pool(s)
    application not enabled on pool 'kubernetes'
    use 'ceph osd pool application enable <pool-name> <app-name>', where <app-name> is 'cephfs', 'rbd', 'rgw', or freeform for custom applications.
|
1
2
|
[centos-41] ~ ceph osd pool application enable kubernetes rbd
enabled application 'rbd' on pool 'kubernetes'
|
有时重启之后,出现dashboard访问不了的情况
1
2
3
4
|
# 将 dashboard 迁移到其他节点
[centos-41] ~ ceph config set mgr mgr/dashboard/server_addr 192.168.4.42
[centos-41] ~ ceph mgr module disable dashboard
[centos-41] ~ ceph mgr module enable dashboard
|
参考:
Ceph实战(三):用docker搭建Ceph集群
Centos7系统Docker Ceph 集群的安装配置(中篇)
Kubernetes 使用 ceph-csi 消费 RBD 作为持久化存储
